
Do you, perhaps, find yourself looking for a new creative project, something cheerful and, well, iconic? Maybe you've seen those adorable little yellow characters from the movies and thought, "I could make one of those!" Well, you absolutely can, and learning to crochet a minion is a super fun way to bring a bit of that movie magic right into your home. It's a project that, honestly, brings a smile to many faces, and it's quite rewarding too, you know?
So, you might be wondering, how does one even begin to make such a charming creature with yarn and a hook? Many people, it seems, start their crochet journey with simple items, but a minion, with its distinct shape and those big, friendly eyes, is actually quite approachable, even for someone who is just starting out. We will go through the steps, really, to get you going on this delightful crafting adventure.
This article, you see, is here to help you understand all the bits and pieces involved in making your very own crocheted minion. We'll talk about what you need, how to start, and some handy tips along the way. It's a project that, for many, is a perfect blend of learning new skills and creating something truly special. So, let's get ready to make some happy little yellow friends, shall we?
Table of Contents
- Getting Ready for Your Minion Project
- The Basics of Crochet for Your Minion
- Shaping Your Minion Friends
- Making Your Minion Stand Out
- Frequently Asked Questions About Crocheting Minions
- Bringing Your Minion to Life
Getting Ready for Your Minion Project
Before you even pick up a hook, it's quite helpful to think about what you'll need. This preparation, you know, sets you up for a smoother experience. When you want to crochet a minion, the right materials really make a difference. It's not just about having yarn; it's about having the right kind of yarn for the job, and the proper tools, too. Many beginners, for instance, might just grab any yarn, but considering the project's needs can save you a bit of trouble later on. So, gathering your supplies is the very first step.
You might be surprised, honestly, at how simple the list of things you need actually is. A crochet hook, some yarn in the right colors, and a few other bits and bobs are usually all it takes. This project, it seems, doesn't ask for a whole lot of fancy equipment. Preparing your workspace a little, clearing a spot where you can comfortably sit and work, is also a good idea. It helps you focus, and that's pretty important for any crafting endeavor, really.
Thinking about your minion's size is also a good idea at this stage. Do you want a tiny one to sit on your desk, or a bigger, huggable friend? The size of your hook and the thickness of your yarn will, you know, play a big part in that. So, it's worth a moment to consider that before you begin. This planning helps, as a matter of fact, ensure your finished minion is just what you imagined.
The Basics of Crochet for Your Minion
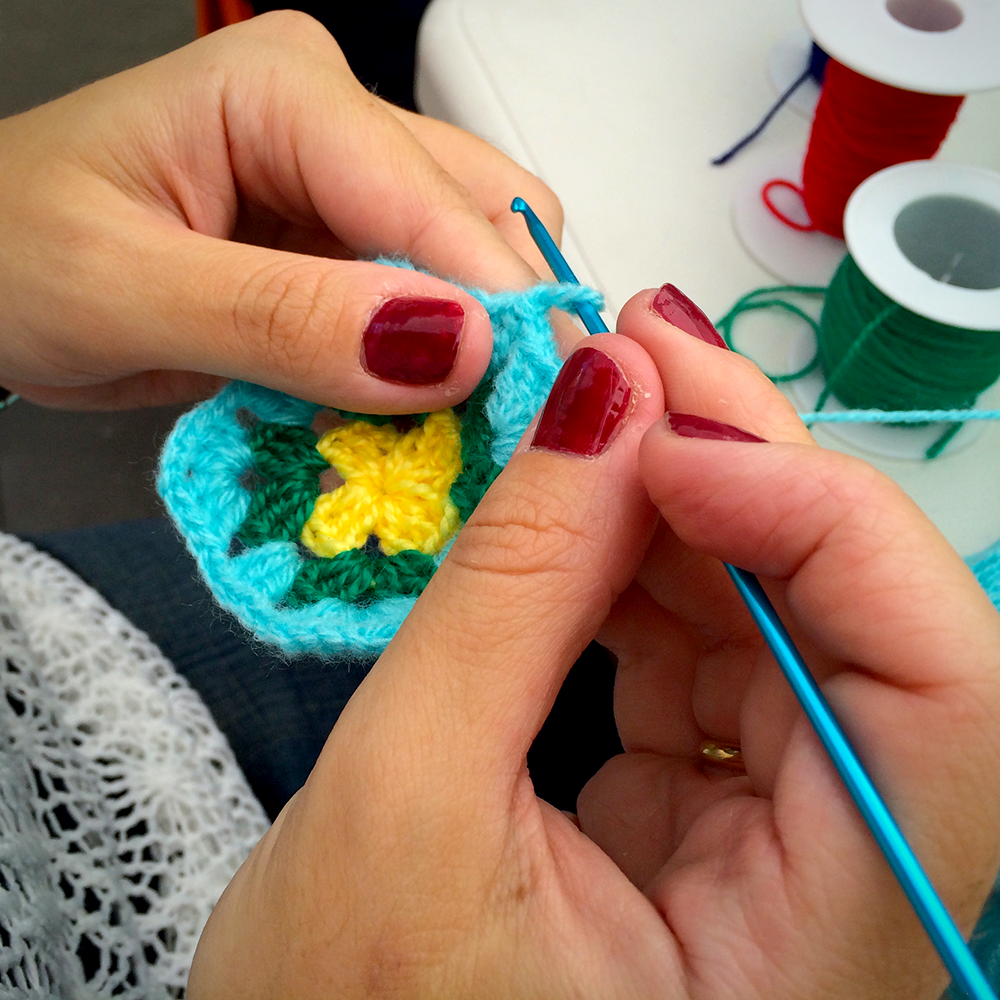
If you are just starting out with crochet, that's perfectly fine! Crocheting a minion can be a fantastic way to learn some basic stitches and techniques. It's like, you know, learning to ride a bike; you start with the simple movements, and then you can do all sorts of things. Our free and easy crochet patterns for beginners often suggest starting with the very basics, and those skills are exactly what you'll use here. You'll learn how to hold your hook and yarn, and that's a pretty fundamental step, actually.
The process of crochet itself is just about interlocking loops of yarn using a hook. It's a very satisfying thing to watch your fabric grow, honestly. For a minion, you'll mostly be working in a round, creating a tube-like shape for the body. This is a common technique in making stuffed toys, which are often called amigurumi. So, you're not just making a minion; you're also picking up a widely used skill in the world of crochet, which is quite cool, I think.
Many people find that practicing the basic stitches a little bit before starting the actual minion helps build confidence. You could, for instance, make a small square just to get a feel for the yarn and the hook. This little practice session, you know, can make the whole minion project feel a lot less intimidating. It's all about taking it one step at a time, which is usually the best approach.
Picking Your Materials
Choosing the right yarn is, in some respects, one of the most exciting parts. For a minion, you'll definitely need yellow yarn for the body, blue for the overalls, and a little bit of black and white for the details like the eyes and goggles. The yarn's label, by the way, often gives you tips on which hook size you should use. This is a really helpful piece of information, as it helps ensure your stitches are just the right tightness, not too loose or too stiff.
Most people, you know, prefer to use acrylic yarn for amigurumi projects like a minion. It's pretty durable, easy to work with, and comes in so many colors. Plus, it's usually machine washable, which is handy for a toy that might get a bit loved. So, when you're browsing for yarn, keep an eye out for those acrylic options. They tend to be a good choice for this kind of project, honestly.
Beyond the yarn and hook, you'll want some stuffing to make your minion plump and cuddly. Polyester fiberfill is a common choice, and it works very well. You'll also need a yarn needle for sewing pieces together and some safety eyes, if you prefer those to crocheted eyes. These little bits, you know, really help bring your minion to life. They're important finishing touches, after all.
Starting Your Crochet Journey
For absolute beginners, the very first steps are usually about getting comfortable with the tools. You'll learn how to prepare your yarn, which often means finding the end and making sure it pulls smoothly. Then, you'll learn how to make a slip knot. This little knot is, in a way, the very beginning of almost every crochet project. It's your starting point, essentially.
After the slip knot, you'll learn how to hold your hook and yarn. There are a few different ways people hold them, so it's about finding what feels natural and comfortable for you. There isn't, you know, one single "right" way, so feel free to experiment a little. The goal is to be able to control the yarn tension, which is quite important for even stitches.
Most crochet projects, including your minion, start with a chain stitch. This forms the foundation row. You'll also learn a basic stitch, often the single crochet. This stitch is super versatile and forms the bulk of many amigurumi projects. Once you get the hang of chaining and single crocheting, you're pretty much ready to start shaping your minion, which is quite exciting, I think.
Shaping Your Minion Friends
Once you've got the basic stitches down, the fun part of shaping your minion really begins. This is where your flat chain of stitches starts to turn into a three-dimensional character. It's a bit like, you know, sculpting with yarn. You'll be increasing and decreasing your stitches to create the round body shape, and that's where the magic happens, honestly. It's quite satisfying to see it take form.
For a minion, you'll primarily be working in continuous rounds, which means you don't join your rows with a slip stitch. This helps create a seamless fabric, which is perfect for stuffed toys. You'll use a stitch marker to keep track of where each round begins, and that's a very helpful tip, especially for beginners. It prevents you from getting lost in your stitches, which can happen, you know?
As you work, you'll find that your minion's body grows steadily. It's a fairly repetitive process, which makes it good for practicing your tension and stitch consistency. And that, in a way, is how you build confidence in your crochet skills. You're not just making a minion; you're also improving your craft, which is pretty neat.
Building the Body
You'll typically start the minion's body with a magic ring, or a chain 2 and then work stitches into the first chain. This creates a tight little circle with no hole in the middle, which is ideal for the top of the minion's head. From there, you'll increase your stitches evenly in each round to create a flat circle, and then, you know, you'll stop increasing to make the sides grow straight up.
The main part of the minion's body is usually just a cylinder shape. You'll crochet many rounds of single crochet stitches without any increases or decreases. This is where the yellow yarn really shines, obviously. It's a good time to put on some music or a podcast, as these rounds can be a bit meditative, you know, just hook after hook. It's a relaxing rhythm, for many.
Once the body reaches a good height, you'll start to decrease your stitches to shape the bottom of the minion. This tapering effect, in some respects, mirrors the increases you did at the top. You'll continue decreasing until the opening is small enough to close up neatly. Before you fully close it, though, remember to stuff your minion firmly. A well-stuffed minion is a happy minion, after all.
Adding the Details
After the main yellow body is done, it's time to add the blue overalls. You'll usually attach the blue yarn and crochet a few rounds for the pants part. This is where your minion really starts to look like the character we all know. You might also crochet little straps for the overalls and attach them later. These small additions, you know, make a big visual impact.
The eyes are, arguably, one of the most important features. You can crochet the eyes themselves, using white and black yarn for the pupils, or you can use safety eyes. Safety eyes are plastic eyes with a backing that snaps on, making them secure for toys. If you choose to crochet the eyes, you'll make small white circles and then tiny black circles for the pupils, and then sew them on. It's a matter of preference, really, how you want to do it.
Don't forget the goggles! These are often crocheted in black yarn, perhaps with a little silver or grey for the frames. You might make a long chain for the strap and then two circles for the lenses. These are then sewn onto the minion's face. The hair, usually just a few strands of black yarn tied onto the head, is the final touch. These little details, you know, really bring out the minion's personality.
Making Your Minion Stand Out
Once you've got the basic minion down, you can, you know, start to play around with different variations. Maybe you want to make a one-eyed minion, or a minion with a different expression. The beauty of crochet is that it's very adaptable. You can change hook sizes, yarn weights, or even just slightly alter a pattern to create something unique. It's quite empowering, actually, to see what you can create.
You might also consider adding accessories. A tiny crocheted banana, for example, would be a perfect addition for your minion friend. Or perhaps a little tool belt? These small extra touches, you know, can really personalize your creation and make it even more special. It's all about having fun with your craft, after all.
Sharing your finished minion with others can also be a wonderful part of the process. Whether it's showing off your work to friends and family, or posting a picture online, it's a way to celebrate your accomplishment. Many people in the crafting community, for instance, love to see what others are making. It's a very supportive group, you know, and seeing others' work can be really inspiring.
Frequently Asked Questions About Crocheting Minions
Here are some common questions people often have when they are thinking about crocheting a minion:
Is crocheting a minion hard for beginners?
Not at all, actually! Many patterns for a crochet minion are designed with beginners in mind. You'll mainly use basic stitches like the single crochet, and the shape is quite straightforward. It's a great project, you know, for getting comfortable with holding your hook and yarn, and making your stitches even. So, don't be afraid to try it!
What kind of yarn is best for a minion?
For a minion, most people find that worsted weight acrylic yarn works best. It's easy to find, comes in all the right colors, and holds its shape well when stuffed. Plus, it's usually quite soft and durable, which is nice for a toy. You could, of course, use other types, but acrylic is a really popular choice, honestly.
Where can I find a free minion crochet pattern?
There are, in fact, many places to find free minion crochet patterns online. Websites like "The Crochet Crowd" offer thousands of free crochet and knitting patterns, and "Easy Crochet" has a library of over 700 free crochet patterns for all skill levels. A quick search, you know, will usually bring up lots of options for you to explore.
Bringing Your Minion to Life
The journey of learning to crochet a minion is, for many, a very rewarding one. From picking out your colorful yarns to seeing that little yellow character take shape, each step is a bit of fun. It's a chance to use your hands, focus your mind, and create something truly special. You might find, as a matter of fact, that you pick up new skills along the way that you can use for all sorts of other projects.
Remember that our site offers a wealth of resources for anyone interested in crochet. You can learn more about on our site, which is pretty helpful for all sorts of projects. There are guides for absolute beginners, like how to make a slip knot or how to hold your hook and yarn. You can also browse through a wide range of tutorials and easy crochet designs to expand your skills even further.
So, whether you're just starting your crochet journey or looking for a fun new project, crocheting a minion is a fantastic choice. It's a way to bring a bit of joy into your crafting, and you'll end up with a charming little friend to show for your efforts. We have so many free crochet patterns for every project you could dream of, and you can always link to this page for more inspiration. Happy hooking!
For more general information about the art of crochet, you might find this external resource helpful: Understanding Crochet Basics. It provides a good overview of the craft's history and fundamental techniques.
Detail Author:
- Name : Prof. Luigi Schneider III
- Username : lauretta55
- Email : emard.gwendolyn@yahoo.com
- Birthdate : 1997-10-01
- Address : 1014 Grimes Stream Apt. 766 South Zelmaburgh, CT 73775-3083
- Phone : 1-929-612-3468
- Company : Glover Ltd
- Job : Potter
- Bio : Repellendus sequi dolores quae et dolores. Maxime facere et qui minima. Nobis nemo facilis et pariatur odio aliquam. Aut quia soluta rerum.
Socials
linkedin:
- url : https://linkedin.com/in/troy_real
- username : troy_real
- bio : Id eaque itaque animi corporis.
- followers : 5345
- following : 2727
twitter:
- url : https://twitter.com/troybergnaum
- username : troybergnaum
- bio : Est et est earum et aut. Officiis soluta autem libero ab deserunt exercitationem. Corporis eum alias adipisci iure sunt occaecati.
- followers : 379
- following : 834
tiktok:
- url : https://tiktok.com/@troy_dev
- username : troy_dev
- bio : Non consectetur sed quia eos nesciunt.
- followers : 1925
- following : 850
facebook:
- url : https://facebook.com/tbergnaum
- username : tbergnaum
- bio : Maiores qui aut unde quis soluta eos. Dolorem et aliquid et eos consequatur.
- followers : 5346
- following : 2170
